Many people who buy refractory castables don’t know how to construct them correctly (see the Refractory Castable Construction Standard), what the procedures are, and what details to pay attention to during construction. As a result, the service life of refractory castables is short and problems occur frequently. If you are still in this stage, quickly take a look at the refractory castable construction process and construct according to the standard.
1.Construction process steps of refractory castable
1.1 Anchors and templates
a. The material of the anchors has a significant impact on the quality of the castable refractory. Generally, heat-resistant stainless steel 1Cr18Ni9ti is used, while Ocr25Ni20 is used in high-temperature areas (above 1280℃). The anchors must be fully welded on both sides, and the welds must be strong. The surface should be coated with a 1-2mm thick layer of asphalt paint or wrapped with tape to counteract the expansion stress at high temperatures.
b. During formwork construction, the formwork should be waterproofed, with a smooth surface coated with asphalt or machine oil. Alternatively, a layer of tar paper can be applied to prevent it from absorbing moisture from the castable refractory and to facilitate easier demolding. The joints of the formwork should be tight to prevent grout leakage.
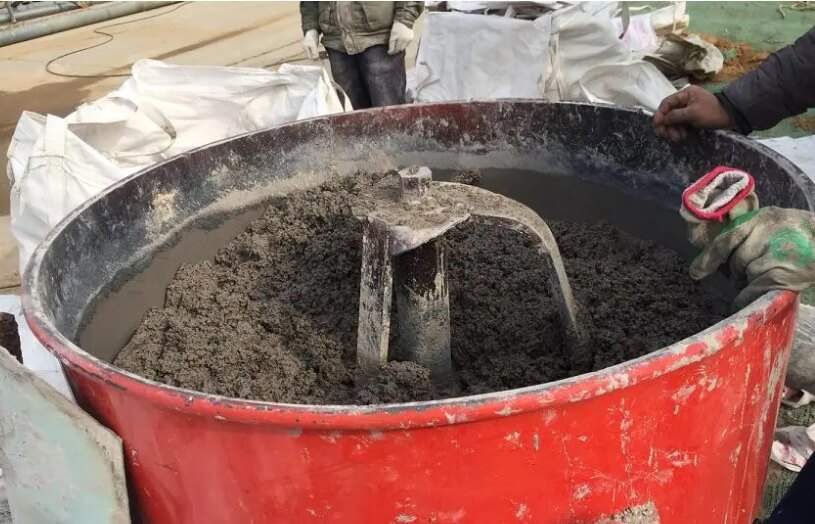
1.2 Stirring and adding water
a. The construction site and mixing container (forced mixer) must be clean and free of debris. No lime, sand, or other impurities must be mixed into the castable. Mechanical mixing of the castable is mandatory; mixing different grades of castable is strictly prohibited.
b. Each bag of castable contains a small bag of powder, which must be pre-mixed for 1-2 minutes until thoroughly mixed before adding water. The weight of each batch of castable to be mixed should be controlled at 150-200 kg, and mixed for approximately 5 minutes until a slurry forms, meeting the requirements for use. However, it is important to note that the castable must be used in whole bags to ensure uniformity. After mixing with water, the castable must be used within 15 minutes (starting from the time water is added). Castable not used within the specified time or that has hardened must be discarded and cannot be remixed or reused.
c. The amount of water added has a significant impact on the quality of the castable and must be strictly controlled, generally between 5% and 8%. When adding water a second time, it should be added slowly to prevent excessive volume. The water used in construction should be clean drinking water (pH value between 6.5 and 7.5).
d. During summer construction, the castable and mixing water should be kept away from prolonged exposure to direct sunlight; shading should be provided, and the ambient temperature should generally be below 38℃. During winter construction, the castable and mixing water should be kept indoors, using warm water for mixing, and the curing time with formwork should be extended. Furthermore, the ambient temperature during casting and curing must not fall below 0℃.
1.3 Pouring
a. Before pouring, the inside of the equipment should be thoroughly cleaned. When pouring large areas, it should be done in sections, with each section ideally 1.5-2 m² in area and no more than 300 mm in height. Vibrate the refractory while adding material to allow any air to escape. The refractory should be poured until a layer of slurry appears on the surface. The vibrator should be removed slowly to avoid creating voids in the refractory. Leave a 2-3 mm expansion joint every 1 m², and proceed in a staggered manner, ensuring no areas are missed.
b. If obstacles create dead corners that make pouring difficult with formwork, manual compaction in layers can be used. Alternatively, the amount of water added to the refractory can be increased appropriately. Care must be taken to ensure no unpoured dead corners are left.
1.4 Maintenance
a. After pouring, the cast body generally needs to be cured in the mold for 24 hours before demolding. Natural curing for another 24 hours after demolding is ideal.
b. After demolding, the pouring quality should be inspected. If honeycomb, spalling, or voids are found, they should be repaired or reworked promptly. For severely problematic areas, the defective parts should be chiseled away to expose the anchors, then filled and compacted with the same quality of castable refractory. It is forbidden to use cement to smooth and cover up the problems. Uneven areas not required by the project specifications should also be repaired promptly.
1.5 Bake
After the above curing process, the refractory castable must undergo a specific baking process before use. The specific heating curve is determined according to the actual situation.
1.6 Notice:
Storage Instructions for Castable Refractories:
① Castable refractory should be stored in a dry warehouse, protected from rain and moisture.
② Castable refractory should not be piled too high in the warehouse; generally, it should be around one meter high.
③ The optimal storage period for castable refractory is 6 months.
⑤ Different grades of castable refractory must be stacked separately, maintaining distance, and properly labeled.
2.Winter construction process of refractory castable
a. Water for mixing: When the ambient temperature is below 5℃, warm water should be used for mixing during construction. The water temperature for heavy castables can be controlled between 10℃ and 50℃, and for lightweight castables between 10℃ and 30℃. Implementation measures: Construct a 3-cubic-meter water storage tank next to each construction mixing machine, insulated with 200mm thick aluminum silicate fiberboard. Use the owner-provided quick-installation boiler to supply low-pressure steam to the water tank, heating it to the appropriate temperature for mixing the castables.
b. Construct a winter construction mixing workshop using insulated panels, and install radiators inside. Utilize the owner-provided quick-installation heating boiler for heating to maintain the mixing area temperature above 0℃.
c. Material storage: During winter construction, materials should be stored indoors or under a rain shelter. If site conditions do not permit, cover them tightly with tarpaulins. On snowy days, clear away any snow and water.
d. When the temperature in the construction area is below 5℃, appropriate heating measures should be taken: When construction work is stopped, cover the work surface with cotton quilts or insulating felt, and add iodine-tungsten lamps, far-infrared electric heaters, or low-pressure heating steam into the work surface within the construction area. Steam curing should be carried out under the quilts using two rows of φ2 small holes drilled in DN20 steel pipes. At night, coal can be used for heating to increase the temperature. Coal should not be placed directly on the refractory surface or boiler components. Large honeycomb briquette stoves or coal stoves made of iron drums should be used. A chimney must be installed to exhaust the smoke, and someone should be on duty at night. During daytime construction, the coal stove should be extinguished to prevent carbon monoxide poisoning. Insulation materials should be used to shield the upwind area of the construction site to reduce cold air intrusion. Close all doors and openings for unattended access and material entry/exit. When no one is working at night or in areas where construction has been completed, block all openings to prevent air convection and reduce heat loss.
Note:
Construction workers must wear appropriate personal protective equipment during winter construction. Avoid wearing hard-soled plastic shoes on the construction site and climbing scaffolding. After rain or snow, promptly clear snow and ice from scaffolding and walkways to prevent slips and falls, and injuries from ice.
3.Refractory Castable Construction Process
3.1 Pre-construction preparation and strict inspection items
The equipment and site to be poured are cleaned; the construction machinery and parts are intact; the material, type, size, layout and welding (fixing) quality of the anchors are checked, and the expansion compensation treatment is done for metal anchors; preventive measures are taken to prevent the surrounding refractory bricks and other castables from getting wet; a pre-test is conducted to check whether the castables have lost their moisture content; the water quality should meet the drinking water standards; the above are accepted and construction is ensured to continue without interruption.
3.2 Construction requirements
a. Mold Making: The mold should be made of steel plate or hardwood. The steel plate should be coated with a release agent, and the wood should be coated with waterproof paint to prevent grout leakage and ensure sufficient strength.
b. Mixing: Use a forced mixer. Pour the castable into the mixer and dry mix for 2-3 minutes. Add water and wet mix for 3-5 minutes. Add water sparingly, at a rate of 7.0-7.5%.
c. Vibration: Immediately after pouring the castable into the mold, use a vibrator to compact it in layers. Avoid missed areas and prolonged or repeated vibration in the same location to prevent segregation and voids. The mixed castable must be used within 20-30 minutes after adding water; discard any partially set material. Expansion joints should be provided according to the design.
d. Curing: The mold can only be removed after the castable surface is dry and has reached 70% strength. Demolding time should be ≥24 hours, and curing time should be ≥24 hours.
e. Drying: Depending on the grade and thickness of the castable lining, as well as the site climate conditions, the user must provide sufficient drying time to ensure that moisture is removed and cracking does not occur. The cumulative drying time should be ≥72 hours.
3.3 Precautions
a. Strictly control the amount of water added. In winter, the room temperature must be above 5℃, and appropriate antifreeze measures must be taken.
b. Forced mixers must be used for mixing; manual mixing is strictly prohibited.
c. Anchor nails must be fitted with expansion caps or coated with asphalt paint, etc.
d. This product must not be mixed with other grades of castable refractory.
4.Construction methods for refractory castables
4.1 Application method
a. Apply the mixture directly to the work surface manually.
b. Apply the mixture to the furnace wall in layers from bottom to top, each layer being 700-1000mm high and 50-100mm thick. Several layers can be applied consecutively. Once the required thickness is achieved, compact and smooth the surface with a trowel. Allow each layer to cure naturally for 3-4 hours before applying the next layer.
c. Apply the mixture to the furnace roof in sections, with each section between two expansion joints. Each layer should be 30-50mm thick and can be applied continuously. Once the required thickness is achieved, compact and smooth the surface with a trowel.
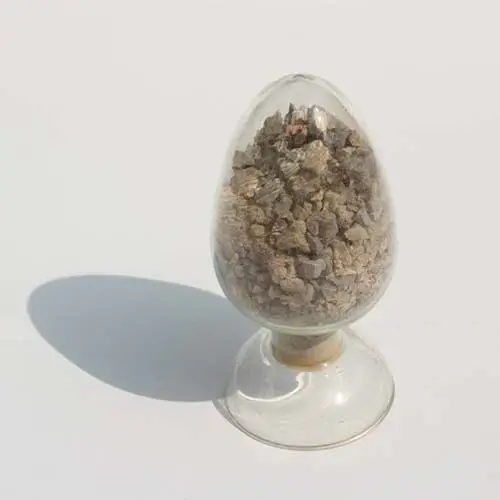
d. For the insulation lining of large-diameter horizontal pipes, it is advisable to first construct the lining in sections and then connect the sections. When constructing the pipe sections, place the pipe horizontally, apply the lower semi-circular lining layer first, allow it to cure naturally for 48 hours, then rotate the pipe 180° and apply the lining layer to the other semi-circular section. After connecting the pipe sections, treat the joints. In the production of refractory castables, fibrous products of varying diameters are often added. These fibers are what we refer to as heat-resistant steel fibers, which are produced from stainless steel or heat-resistant steel containing alloying elements such as chromium and nickel. The manufacturing methods include: wire cutting and pressing, steel block cutting, and molten steel drawing. The first two methods offer stable quality and high strength, but are more expensive. The latter method is simpler, produces unique shapes, has strong bonding force, and is lower in cost; it is produced by multiple manufacturers and is therefore widely used.
4.2 Pouring construction method
a. Layered and segmented pouring, with cross-operation allowed. The furnace wall should be poured in layers, each layer 700-1000mm high. The furnace roof should be constructed in sections, with the section between the two expansion joints completed in one pour.
b. Erect the formwork according to the design dimensions. Lay a layer of plastic film inside the formwork. Pour the refractory mixture into the formwork, ensuring even distribution. Do not use a vibrator for compaction.
c. For refractory with a density not exceeding 0.8g/cm³, compact in layers with a trowel after pouring. For refractory with a density not less than 1.0g/cm³, compact with tools after pouring.
d. Curing and demolding: Demolding can be done after 4 hours of natural curing at an ambient temperature not exceeding 20℃. Demolding can be done after 5-7 hours of natural curing at an ambient temperature not exceeding 20℃. Repair any localized edge damage after demolding. The demolding time for the furnace roof should be extended as appropriate.
Additionally, the amount of steel fiber added to the refractory should not be too high. Adding too much steel fiber can deteriorate the high-temperature physicochemical properties of refractory castables. For example, steel fibers can increase the residual linear expansion of the castable after high-temperature firing. Simultaneously, it increases the iron oxide content in the castable, reducing its corrosion resistance and affecting its workability during construction. Therefore, the appropriate amount of steel fiber should be determined based on the type of kiln, the location of application, and the operating temperature.
4.3 Projection construction method
a. Apply the mixture layer by layer onto the work surface using a manual projection method. Once the projected thickness reaches the designed dimensions, compact and smooth it with a trowel.
b. For the furnace walls and vertical pipe linings, construct in layers from bottom to top, with each layer being 700–1000 mm high. Allow each layer to cure naturally for 3–4 hours before constructing the next layer.
c. This method is not suitable for furnace top lining construction.
5.Preparatory procedures before refractory castable construction
Before applying the refractory castable, the work area and surrounding environment must be cordoned off and kept clean to prevent contamination of the refractory materials. Tools and equipment used in the application should also be kept clean. The application of refractory castable consists of three stages: mixing, pouring, and curing. Mixing and the preceding preparatory work are considered part of the preparatory procedures before refractory castable application, and the following nine aspects are highlighted.
- Clean water should be used for mixing refractory castables during construction. In coastal areas, the water used for mixing should be tested, and its chloride ion content should not exceed 0.03% (300 ppm).
- Mechanical mixing, preferably using a forced-action concrete mixer, should be used for mixing refractory castables. Water glass refractory castables and phosphoric acid/phosphate refractory castables can be mixed using a vibratory mixer, supplemented by manual mixing. When changing the material grade, the mixer, hopper, weighing containers, etc., should be thoroughly cleaned. Mixing time and liquid addition should strictly follow the construction instructions. Mechanical equipment should be securely installed, and the distance between the equipment and the casting site should be minimized. Mechanical equipment should be repaired and tested before use. Castables must be measured according to the mix proportions, and all scales, measuring cups, and measuring cylinders used must be calibrated. All tools used in each stage of refractory castable construction must be intact and kept clean, and moistened with water before use. 3. On-site Inspection of Raw Materials
① Cement that has become damp and lumpy must not be used; cement that shows slight signs of dampness but has not lumped (it crumbles upon contact) and is not expired must not be used in key areas.
② Different types of cement must not be mixed.
③ If the modulus and density of water glass do not meet the design requirements, they should be adjusted; if sediment is present, it should be filtered and a sample sent for retesting.
④ Powders of various materials that are damp or mixed with other impurities should be inspected a second time, and can only be used after passing the inspection.
⑤ The particle size and mix proportions of various aggregates should meet the design requirements.
- Sampling Inspection of Raw Materials
① Raw materials for refractory castables without a product certificate of conformity or inspection report must not be used; if there are doubts about their quality during on-site inspection, representative samples should be taken and sent to a qualified department for testing and analysis.
② The results of the second inspection, if meeting the requirements, should be used as qualified products; if not, they should be downgraded or not used at all.
- The batching of refractory castables should be carried out according to the designed mix proportions. The allowable error for aggregate measurement is 3%, and the allowable error for accelerators, water, various binders, and powders is 2%.
Strictly control the water-cement ratio of the refractory castable. For damp aggregates, the moisture content should be measured, and the water content of the refractory castable should be adjusted accordingly.
- Mechanical mixing of refractory castables is typically performed using mechanical mixing, following these procedures:
① Before feeding materials, start the mixer and run it idle for 2 minutes. Once it is operating normally, materials can be fed in.
② The feeding sequence is: first add powder and binder, then add aggregates for dry mixing.
③ Immediately after feeding materials, open the valve to add water, filling it to two-thirds of the controlled volume. Then, continue mixing by adding the remaining three-thirds of the water.
④ Mixing should be continuous and should not be stopped midway. After mixing for the specified time (no less than 5 minutes), the material can be discharged. The machine should not be stopped during the discharge process.
⑤ After mixing is complete, rinse the inside of the mixer thoroughly with water.
- Manual Mixing: When the quantity of refractory castable is small or mechanical mixing is not feasible, manual mixing can be used. The mixing site should be a firm, flat location that is easy to clean, and the following procedure should be followed:
① Clean the mixing site thoroughly. Add aggregates, powders, and binders (cement) in sequence, and mix the dry materials. The mixing should be repeated at least three times.
② Spread the dry-mixed material out, dig a pit in the center, and add an appropriate amount of water. Soak for at least 3 minutes.
③ When the added water has been largely absorbed by the dry material, use a shovel to gradually mix from the periphery towards the center, ensuring no dry material remains. Then, turn the mixture over at least three times until the refractory castable is uniformly mixed.
- Water-cement ratio control: The water-cement ratio of the refractory castable should be strictly controlled. When using mechanical vibration, the slump of the refractory castable should not exceed 3-4 cm; when using manual compaction, it should not exceed 5-6 cm. For special locations such as areas with densely packed pipes penetrating walls, the water-cement ratio can be adjusted appropriately.
- Pouring time limit: The mixed refractory castable should be poured within 30 minutes, or within the specified time according to the construction instructions.
6.Construction details of refractory castable
6.1 Construction details of refractory castables
Before applying the refractory castable, the area to be treated should be thoroughly cleaned to remove rust and impurities from the surface. This will prevent the refractory castable from falling off or cracking due to excessive impurities after casting.
6.2 Refractory Castable Construction Details 2
When mixing refractory castables, the amount of water added must be precise, neither too much nor too little, depending on the specific application. Adding too much water will cause the aggregate and matrix to separate, affecting the castable’s performance and reducing its density, strength, alkali resistance, and abrasion resistance. Insufficient water will result in poor workability, preventing the material from flowing properly and achieving dense packing, hindering air bubble removal, and preventing the formation of a tight aggregate, directly impacting the castable’s overall performance.
6.3 Refractory Castable Construction Details 3
Some castable refractory materials require forced mixing with a mixer during use; manual mixing is strictly prohibited. Furthermore, the anchoring nails used must be fitted with expansion caps or coated with asphalt paint. Therefore, during construction, the instructions in the manual should be carefully reviewed and the refractory castable used strictly according to the instructions.
6.4 Construction details of refractory castables Details 4
The curing of refractory castables is generally required to last for 24 hours. This curing time enhances the performance of the refractory castable and prevents the addition of water directly after solidification, as this would render the castable unusable. Therefore, proper curing after solidification is crucial.
7. Construction precautions for refractory castables
The construction of refractory castables consists of three stages: mixing, pouring, and curing.
- Mixing: A forced-action mixer or mortar mixer must be used for mixing; manual mixing is not permitted.
① Equipment and Tools: Forced-action or mortar mixer, buckets, scales, vibrator, shovel, wheelbarrow, etc.
② Mixing: First, add the large bag of material to the mixer, then add the small bag. Dry mix for 1-2 minutes before discharging for pouring.
③ Method for Judging Moisture Content: To determine if the moisture content of the mixed material is appropriate, a simple “kneading into a ball” test can be used: if the ball deforms and leaks from between the fingers, the moisture content is too high; if the ball cracks and falls apart, the moisture content is too low.
④ Water Consumption for Mixing: Strictly adhere to the water consumption specified in the product instruction manual for this batch of products, and accurately measure the water usage.
- Casting Construction:
① Inspection: Before casting, check that the anchors are securely welded. For areas above 500℃, use heat-resistant anchors. The anchor surface should be coated with 0.5-1mm thick paint or wrapped with plastic tape to buffer the expansion force after heating. Remove any debris from the mold.
② Casting Time Control: Freshly mixed castable should be cast quickly, generally within 20 minutes.
③ Casting: Pour the mixed castable into the mold and immediately insert a vibrator to compact it. Vibration should be even. Move the vibrator only when the surface of the castable is smooth and flowing, at a speed of 1-2 meters per minute. Remove the vibrator slowly.
④ Post-Casting Temperature Control: Before setting, the site temperature must be maintained above 5℃ (5-30℃). If the site temperature is below 5℃, appropriate temperature protection measures must be taken; otherwise, delayed setting will occur, leading to a decrease in product performance.
Precautions:
① The surface of the castable refractory after vibration should be left natural. Do not smooth it with tools, and absolutely do not sprinkle cement powder on the surface for smoothing.
② A spare vibrator should be available so that it can be used promptly in case of a malfunction.
③ After construction is completed, the castable body must not be moved, vibrated, or tamped within 24 hours, especially before the castable refractory hardens. Otherwise, cracks or even complete damage may occur.
④ Castable refractory should be applied continuously. If continuous application is not possible for any reason, a construction joint should be left at an expansion joint. Otherwise, the construction joint should be roughened by making cross-shaped grooves approximately 10mm deep and 20mm wide, spaced about 100mm apart, on the castable refractory.
- Curing:
① Tools: Polyethylene plastic film, straw bags, etc.
② Ambient Temperature Requirements and Control: The curing temperature of the castable should ideally be between 15-35℃. If this temperature range is exceeded, appropriate heating or cooling measures should be taken; otherwise, the product’s performance will deteriorate.
③ Curing: After the castable has hardened, immediately cover the surface of the castable with polyethylene plastic film, and then cover it with damp straw bags to prevent moisture evaporation and promote cement activation. Do not knock or vibrate within 24 days after hardening. Depending on the hardening process, the formwork can generally be removed after 24-30 hours of hardening. After demolding, cure for 2 days as needed, continuing to cover with polyethylene plastic film and damp straw bags during curing. After 3 days of oxidation, remove the polyethylene plastic film and damp straw bags. Allow the castable to air dry naturally for 1 day before baking.